Front GPart G · Crafts № 39
Crafts
How to Make a Scrapbook
How to make a scrapbook from scratch: choose an album and a theme, sort your photos, plan simple page layouts and add journaling. Includes scrapbook ideas.
4 minutes
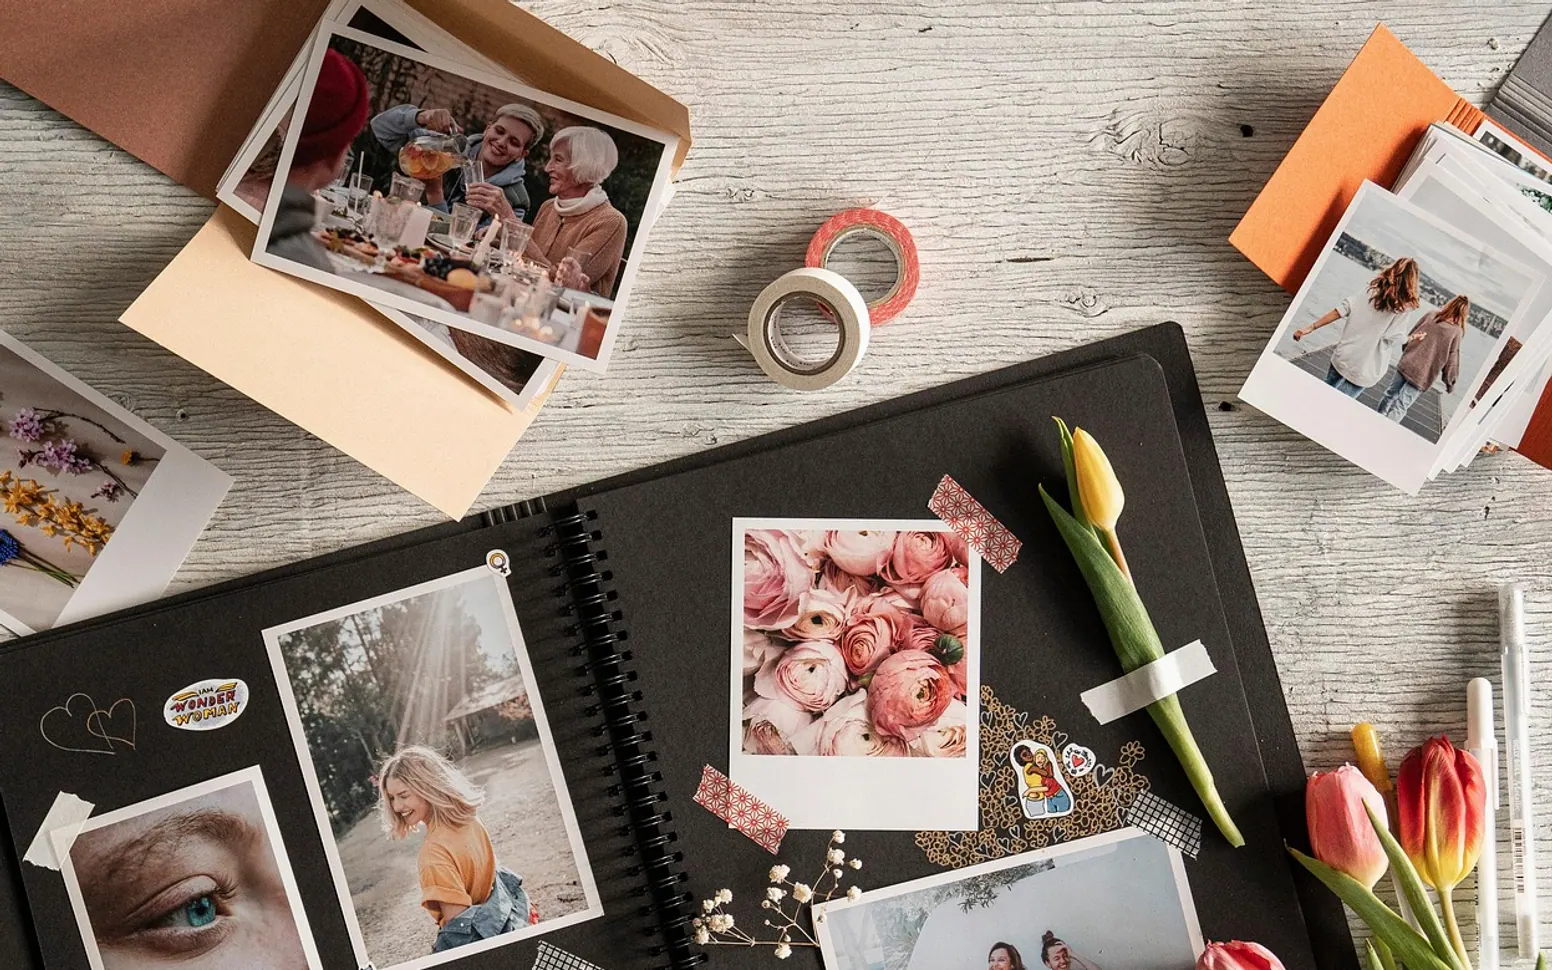
Making a scrapbook comes down to five steps: pick a theme, choose an album, sort your photos and keepsakes, lay out each page around one main picture, and add a few lines of writing so the story survives. Beginners often stall because they buy lots of supplies first. Start with what you already have, a glue stick and some plain card, and the album will take shape faster than you expect.
Step 1: Decide what the scrapbook is about
A clear theme stops the project from sprawling. It also tells you which photos to leave out, which is half the work. Some scrapbook ideas that suit a first album:
- One holiday or road trip, told in order from packing to coming home.
- A year in the life of a family, one or two pages per month.
- A baby's first year, a wedding, or a milestone birthday.
- A pet, from first day home to favourite walks.
- A recipe scrapbook, mixing handwritten recipes with photos of the dishes and the people who cooked them.
- A gift album for a friend, filled with shared memories and notes from other friends.
Step 2: Choose an album and paper
Albums come in a few standard formats. The main choices are size and binding.
| Album type | How pages attach | Good for |
|---|---|---|
| Post-bound | Screws through the spine; add pages easily | Projects that will keep growing |
| Strap-hinge | Straps thread through staples on each page | Two-page spreads that lie flat |
| Ring-bound | Pages or sleeves clip onto metal rings | Beginners who want to rearrange freely |
| Bound notebook or sketchbook | Fixed pages | Small, informal or travel scrapbooks |
Square 12-by-12-inch albums are the traditional size and give lots of room. Smaller formats such as 8-by-8 or 6-by-8 inches fill up faster, which can be encouraging on a first project. Whatever you choose, look for paper and adhesives labelled acid-free and lignin-free. They are made to avoid yellowing and to be kinder to photos over time.
Basic supplies
- Background card or patterned paper.
- Photo-safe adhesive: tape runner, glue dots or photo corners.
- Scissors and, ideally, a paper trimmer for straight edges.
- A fine black pen that will not fade or bleed.
- Optional extras: stickers, washi tape, stamps, die-cut shapes and small envelopes for loose keepsakes.
Step 3: Sort photos and keepsakes
Gather everything for the theme in one place and sort it into piles by event or date. Then be strict. Choose the clearest, most expressive photos and skip near-duplicates. For each page, aim for one strong focal photo and two to four supporting ones. Keep keepsakes like tickets, labels, letters and leaves with the photos they belong to. Leaves and flowers should be pressed and completely dry before they go in, or they can brown and mark the photos beside them.
If photos are on your phone, print them in a mix of sizes. A few large prints give pages a centre of gravity, while small ones fill gaps.
Step 4: Lay out each page
- Pick the background. Plain or quietly patterned card lets the photos lead.
- Place the focal photo first. Try it slightly off centre, which usually looks more natural than dead centre.
- Group the supporting photos. Clustering photos together, rather than scattering them, makes a page feel calm.
- Leave room for words. Mark out a space for a title and a short block of writing.
- Add a few embellishments. Three small touches are usually plenty. Too many make a page feel cluttered.
- Check, then stick. Arrange everything loosely and take a quick phone photo before gluing, so you can rebuild the layout if something moves.
Layout habits from collage work carry across well. Our guide on how to make a vision board covers grouping, balance and leaving breathing space.
Step 5: Add the story
Journaling, the written part of a scrapbook, is what turns an album of photos into a record. A few sentences per page are enough. Note the who, where and when, then add one detail a photo cannot show: what someone said, how a place smelled, what went wrong and became a family joke. Handwriting adds personality, but printed captions are fine if you prefer them. If writing feels hard, start with a single line per page and add more later.
Scrapbooking for beginners: common mistakes
- Waiting for the perfect supplies. A first album can be plain card, photos and handwriting.
- Using every photo. Fewer, better pictures make stronger pages.
- Cutting into irreplaceable originals. Copy old or one-of-a-kind photos and use the copies.
- Using household glue or sticky tape. These can discolour paper and photos over time.
- Trying to finish in one sitting. Working a page or two at a time keeps it enjoyable.
Questions people ask
How many pages should a first scrapbook have?
There is no rule. Ten to twenty pages is a manageable first goal, and post-bound or ring albums let you add more later.
Is a scrapbook the same as a travel journal?
They overlap. A travel journal is usually written during the trip, with keepsakes stuck in as you go, while a scrapbook is often assembled afterwards with more planning. Our travel journal ideas work well as the raw material for a scrapbook later.
Can a scrapbook be a gift?
It is one of the most personal gifts there is. Ask friends or family to contribute a page each, then bind them together for a birthday, anniversary or farewell. A handmade card on the first page makes a fine opening; our guide on how to make a pop-up card has simple designs.
Questions? Write to us.
Suggestions help us plan.
Further in section G · Crafts
-
 How to Make a Wreath · 4 minutes
 -
 Salt Dough Ornaments: Recipe, Shaping and Drying · 4 minutes
 -
 How to Make a Pop-Up Card · 4 minutes